
Equipped with the bipod, you’ll be able to hold the gun in a stable manner when shooting prone.
It is easier and more stable than supporting the gun with your arm, and is especially effective when you are wary of a certain direction for a long period of time.
It is a recommended part for light machine guns such as heavy minimi and sniper rifles that are often operated without moving too much.
It also has the advantage of being able to safely place the gun in survival games. Many fields have gun racks, but if you own a lot of guns or have a lot of game participants, you may not be able to put them in the gun rack.
At that time, if you have a bipod, you can place the gun stably on the ground.
Many bipods do not have instructions, so we will explain the main installation methods.
How to install the bipod
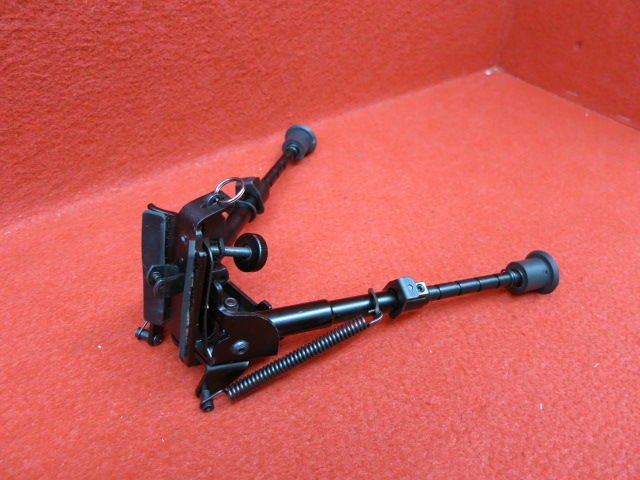
(1) For Harris Bipod
The most orthodox is the Harris-style bipod.
The picture below is the Harris type bipod.
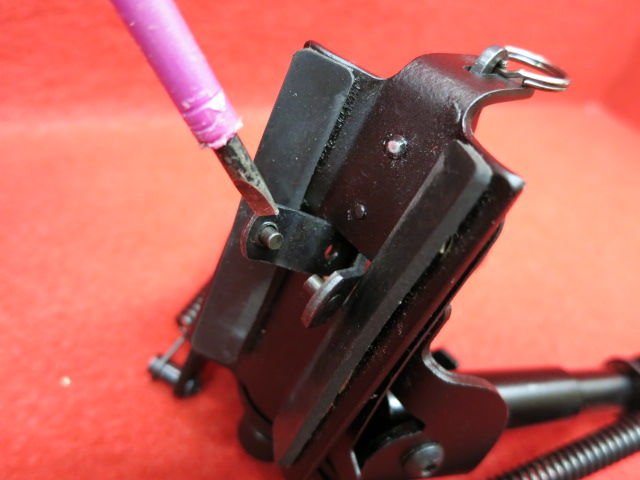
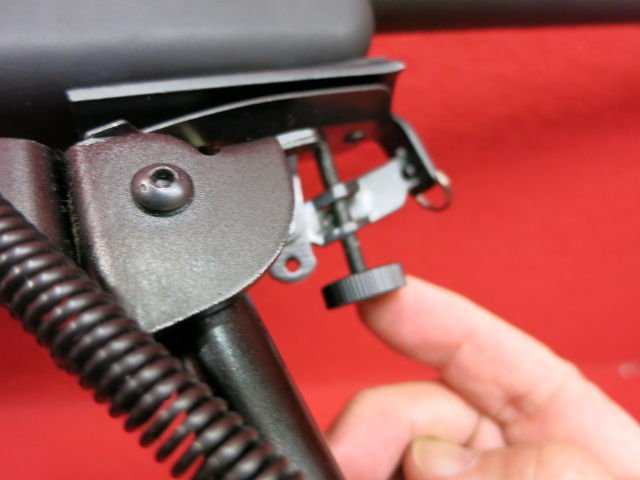
The driver is pointing at the swivel stud grab.
With the grip attached to this bipod, grasp the protrusion called the stud attached to the main body and tighten the screw to fix it.
The procedure is …
First, check the swivel stud on the underside of the stock of the main body.
This protrusion is the swivel stud.
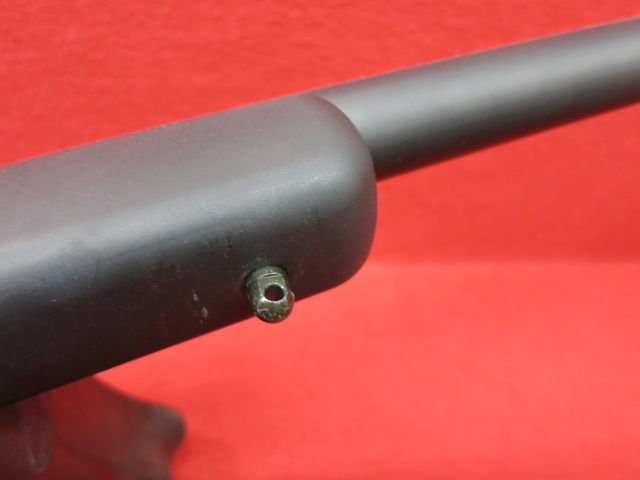
The one in this photo is Tokyo Marui’s VSR-10 Pro Sniper.
Originally, this swivel stud is for attaching a swivel (where the sling is applied).
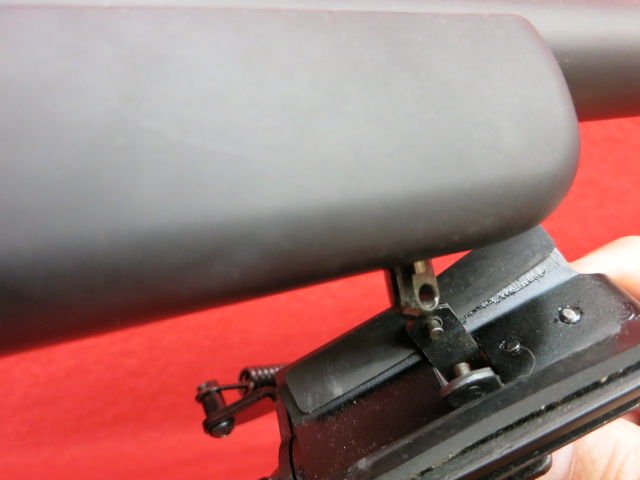
Some of them are equipped with swivel studs from the beginning, but if you don’t have them, you can’t install the Harris type bipod unless you make a hole in the stock and install the swivel studs.
Also, as shown in this photo, some swivels are equipped from the beginning, such as Tokyo Marui’s VSR-10 G spec.

In this case, remove the swivel and leave only the studs.
If you want to equip this swivel after installing the bipod, there is a hole on the opposite side of the stud grip of the bipod, so use it to equip the swivel.
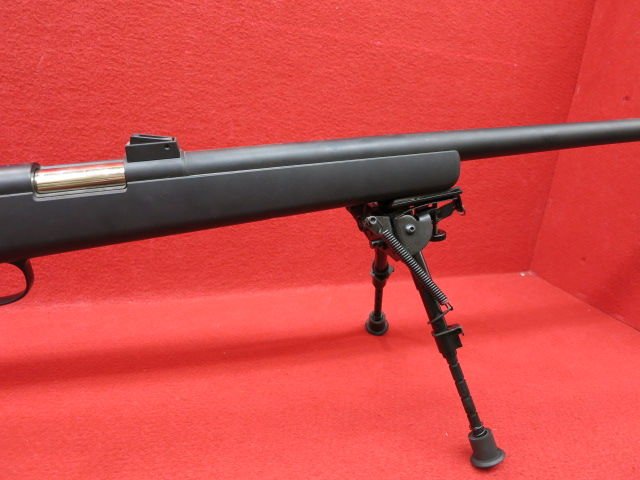
Sniper rifles fold the legs of the bipod forward, but LMGs etc. may fold back.
(2) Install a Harris rifle bipod with 20mm rail
Use a bipod with a 20mm rail attachment as shown in the picture.
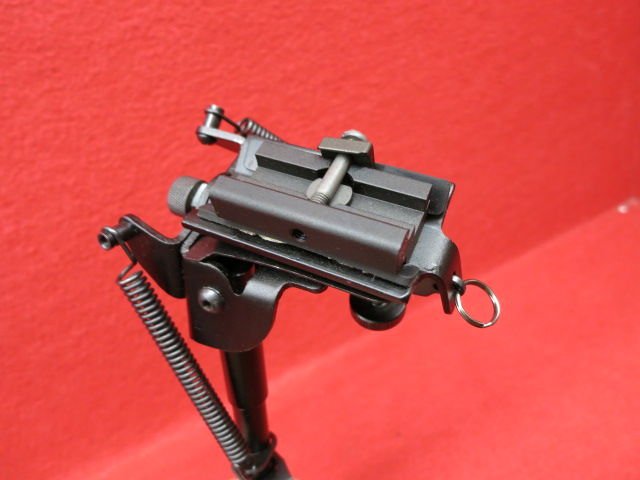
First attach the attachment using the attachment studs with the bipod stud grab.
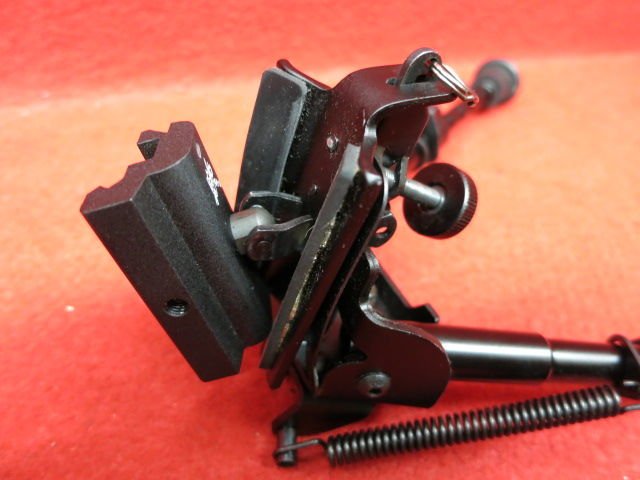


Align the 20mm rail adapter attachment with the rail of the Rail handguard, and tighten the fixing screw of the attachment to fix it.
I just attached a bipod to the Tokyo Marui rifle


